Securing Applications: OWASP Top 10 and the Tools That Help(SonarQube, Snyk, and Veracode)

The OWASP Top 10 (2025 edition) is a globally recognized list of the most critical security risks in modern applications. It serves as a guide for developers, architects, and security professionals to build safer software. With the rise of cloud-native architectures, supply chain dependencies, and rapid release cycles, these vulnerabilities are more relevant than ever. Integrating SonarQube, a leading static code analysis platform, into your CI/CD pipeline ensures that these risks are identified and addressed before they reach production.

  1. Broken Access Control
    • Unauthorized users gain access to restricted resources.
    • SonarQube helps detect insecure authorization logic and missing role checks.
  2. Security Misconfiguration
    • Default credentials, open ports, or misconfigured frameworks.
    • SonarQube flags hardcoded secrets and unsafe configurations.
  3. Software Supply Chain Failures
    • Risks from third-party libraries and dependencies.
    • SonarQube integrates with dependency scanners to highlight vulnerable packages.
  4. Cryptographic Failures
    • Weak or outdated encryption algorithms.
    • SonarQube identifies insecure cryptographic usage (e.g., MD5, SHA1).
  5. Injection
    • SQL, NoSQL, or command injection attacks.
    • SonarQube detects unsafe query concatenations and missing parameterization.
  6. Insecure Design
    • Flaws in architecture or logic that create exploitable weaknesses.
    • SonarQube enforces secure coding practices and design patterns.
  7. Authentication Failures
    • Weak login mechanisms or missing MFA.
    • SonarQube highlights insecure password handling and missing validation.
  8. Software or Data Integrity Failures
    • Tampering with code, updates, or data.
    • SonarQube checks for unsafe deserialization and integrity validation gaps.
  9. Logging & Alerting Failures
    • Missing or insufficient monitoring of critical events.
    • SonarQube encourages proper logging practices and error handling.
  10. Mishandling of Exceptional Conditions
    • Poor error handling that exposes sensitive data.
    • SonarQube flags unhandled exceptions and unsafe error messages.
  • Static Code Analysis: Detects vulnerabilities aligned with OWASP Top 10 categories.
  • Continuous Integration: Integrates with Jenkins, GitHub Actions, and GitLab CI/CD to enforce security gates.
  • Developer Feedback Loop: Provides instant feedback in IDEs via SonarLint, reducing the time to fix issues.
  • Compliance Reporting: Generates OWASP and CWE compliance reports for audits

The OWASP Top 10 is not just a checklist—it’s a mindset for secure development. By embedding SonarQube into your pipeline, you shorten the vulnerability feedback loop, empower developers to fix issues early, and align your software with industry best practices. In today’s fast-paced DevOps world, combining OWASP guidance with SonarQube’s automated analysis is the most effective way to build resilient, secure applications.

  • SonarSource – OWASP Security Vulnerability Coverage
  • OWASP Top 10:2025 Introduction
  • Zerothreat.ai – OWASP Top 10 2025 Update

will Microsoft Garnet: The Future of Scalable Cache Solutions ?

In the era of cloud-native applications, real-time analytics, and AI-driven workloads, traditional caching systems like Redis and Memcached are hitting their limits. Enter Microsoft Garnet—a next-generation open-source cache-store designed to deliver blazing speed, durability, and extensibility at scale.
How It Started: From Research to Reality

Garnet was born out of Microsoft Research, where engineers spent nearly a decade reimagining the caching layer for modern infrastructure. The goal? Build a cache that could handle massive concurrency, tiered storage, and custom logic—without compromising performance.

Garnet is not just a research project—it’s already in production use across several Microsoft services:

  • Azure Resource Manager: Garnet helps accelerate metadata access and configuration management.
  • Azure Resource Graph: Powers fast, scalable queries across Azure resources.
  • Windows & Web Experiences Platform: Enhances responsiveness and data delivery for user-facing services.

These deployments validate Garnet’s readiness for enterprise-scale workloads.

  • Thread-scalable architecture: Efficient multi-threading within a single node.
  • Cluster-native design: Built-in sharding, replication, and failover.
  • Durability: Supports persistent storage via SSDs and cloud (Azure Storage).
  • ACID Transactions: Ensures consistency for complex operations.
  • Extensibility: Custom modules and APIs for tailored functionality.
  • RESP Protocol Support: Compatible with Redis clients.
  • Tiered Storage: Operates across RAM, SSD, and cloud seamlessly.
  • Low-latency performance: Designed for sub-millisecond response times.

Garnet supports the Redis Serialization Protocol (RESP), making it compatible with most Redis clients:

  • StackExchange.Redis (C#)
  • redis-py (Python)
  • node-redis (Node.js)
  • Jedis (Java)

This means team can switch to Garnet without rewriting client code.

Garnet’s architecture is built around:

  • Single-node thread-scalable execution
  • Clustered sharded execution
  • Log-structured memory and storage
  • Custom command registration and module APIs

This modular design allows Garnet to scale horizontally while remaining highly customizable.

Use Cases

  • Real-time web applications
  • Gaming backends
  • AI inference caching
  • IoT telemetry buffering
  • Cloud-native microservices
  • 2x throughput compared to Redis in multi-threaded scenarios
  • Lower tail latency under high concurrency
  • Efficient memory usage with log-structured storage

Future Roadmap

  • Deepen Azure integration
  • Expand module ecosystem
  • Enhance observability and telemetry
  • Support more advanced data types and indexing

Garnet is open-source and available on GitHub. we can run it locally, in containers, or integrate it into your cloud stack.

git clone https://github.com/microsoft/garnet
cd garnet
dotnet run

Microsoft Garnet isn’t just another cache—it’s a platform for building intelligent, scalable, and durable data services. Whether you’re optimizing latency for a web app or building a distributed AI pipeline, Garnet offers the flexibility and performance to meet your needs.

From azure Classic to YAML: A Complete Guide to Modernizing Azure DevOps Pipelines

In the fast-evolving world of DevOps, staying current with best practices is essential. One of the most impactful upgrades you can make is migrating from classic build and release pipelines to YAML-based pipelines in Azure DevOps. This blog walks you through the entire journey—from setting up your Azure DevOps organization to deploying a multi-stage YAML pipeline using a self-hosted agent.

Are you still using classic pipelines in Azure DevOps? It’s time to modernize! YAML pipelines offer version control, reusability, and better visibility. In this guide, you’ll learn how to:

  • Set up a new Azure DevOps organization and project
  • Configure a self-hosted agent
  • Create classic build and release pipelines
  • Migrate to a multi-stage YAML pipeline

Before you begin migrating classic Azure DevOps pipelines to YAML, make sure you have the following setup and access:

  • An active Azure subscription
  • Permissions to create and manage resources in the Azure portal
  • A Windows-based VM provisioned in Azure
  • RDP access to the VM using credentials derived from the App Service name (e.g., lab-app-xyz → password: xyzAa!1)
  • Remote Desktop client installed on your local machine
  • Ability to create a new Azure DevOps organization and project
  • Access to Organization Settings to enable classic pipeline creation
  • Familiarity with navigating Azure DevOps UI (Repos, Pipelines, Releases)
  • PowerShell installed on the VM
  • Microsoft Edge or another browser on the VM
  • A generated Personal Access Token (PAT) with Agent Pools → Read & Manage scope
  • Notepad or any text editor to store URLs, tokens, and credentials
  • App Service name (e.g., lab-app-xyz)
  • Password extracted from the downloaded publish profile (value of userPWD, excluding quotes)

🛠️ Step 1: Set Up Azure DevOps and Your VM

  1. Connect to your Azure VM
    • Use the RDP file from the Azure portal
    • Username: lab-vm
    • Password: Derived from App Service name + Aa!1
  2. Create a new Azure DevOps organization
    • Go to Azure DevOps Organizations
    • Click Create new organization
    • Record the URL (e.g., https://dev.azure.com/clouduser123)
  3. Create a project
    • Name it migrate-classic-pipelines
  4. Enable classic pipelines
  • Go to Organization Settings → Pipelines → Settings
  • Turn OFF both “Disable creation of classic build/release pipelines”

⚙️ Step 2: Configure a Self-Hosted Agent

  1. Create an agent pool
    • Name it LabPool
  2. Download the agent
    • Use the URL provided in the “New agent” window
    • Copy the PowerShell unzip command
  3. Generate a PAT token
    • Scope: Agent Pools → Read & Manage
    • Save it securely
  4. Install the agent on the VM
  • Extract the agent
  • Run config.cmd
  • Use your DevOps URL, PAT, and pool name
  • Start the agent with run.cmd

🧪 Step 3: Create a Classic Build Pipeline

  1. Import the GitHub repo
    • URL:
  2. Use the Classic Editor
    • Add tasks:
    • Use .NET Core SDK 8.x
    • dotnet build
    • dotnet test
    • dotnet publish
    • Publish Pipeline Artifact
  3. Fix hosted agent error
  • Switch the agent pool to LabPool

🚀 Step 4: Create a Classic Release Pipeline

  1. Add artifact from build pipeline
  2. Enable Continuous Deployment Trigger
  3. Add a PowerShell task
  • Use deploy.ps1 from the GitHub repo
  • Replace TODO values with your App Service name and password from the publish profile

🔄 Step 5: Migrate to YAML

  1. Export the classic build pipeline to YAML
  2. Create a new YAML pipeline
  • Use LabPool
  • Wrap steps in:

stages: – stage: CI jobs: …

  1. Add a CD stage
  • Include DownloadPipelineArtifact
  • Add the PowerShell deployment script
  • Update $packageLocation to match the artifact path

✅ Final Result

You now have a fully functional multi-stage YAML pipeline that builds, tests, publishes, and deploys your app using a self-hosted agent. This setup is:

  • Version-controlled
  • Scalable
  • Easier to maintain

🧠 Pro Tips

  • Use Azure Key Vault for secrets instead of hardcoding passwords
  • Modularize your YAML with templates
  • Monitor your self-hosted agent’s health regularly

Jira & Confluence Support Specialist (2+ Years Experience)

Job Summary: We are seeking an experienced Jira & Confluence Support Specialist with a strong grasp of Atlassian tools to support our internal teams. You’ll play a key role in managing, configuring, and optimizing Jira and Confluence environments, while also providing top-notch support and best practices guidance to end users.

  • Provide day-to-day support for Jira and Confluence users across the organization
  • Configure Jira workflows, schemes, custom fields, permissions, and dashboards as per project requirements
  • Assist in the integration of Jira with other tools (Slack, GitHub, etc.)
  • Maintain and administer Confluence spaces, permissions, templates, and macros
  • Monitor performance and troubleshoot issues related to Atlassian tools
  • Deliver user training and create documentation for processes, usage, and best practices
  • Collaborate with development and project management teams to streamline agile practices
  • Minimum 2 years of hands-on experience with Jira and Confluence administration and support
  • Strong understanding of project tracking, agile methodologies, and Jira configurations
  • Familiarity with JQL (Jira Query Language)
  • Basic understanding of plug-ins and integrations within the Atlassian ecosystem
  • Excellent problem-solving, communication, and customer service skills
  • Atlassian certifications (ACP-120, ACP-100) , ITIL Foundation
  • Scripting experience using ScriptRunner or similar add-ons
  • Familiarity with ITSM or DevOps environments

Future of Caching: Microsoft Garnet vs Redis

In a world where milliseconds matter, the performance of your in-memory cache can make or break user experience. Enter Microsoft Garnet, the next-generation cache-store that’s quietly—but powerfully—changing the game in distributed application performance.

Developed by Microsoft Research, Garnet is a high-throughput, low-latency, open-source remote cache that’s compatible with Redis clients. It speaks the RESP protocol, supports cluster sharding, replication, and checkpointing, and is written entirely in modern C#. Designed for scale, Garnet is now used internally by services like:

  • 🔷 Azure Resource Manager
  • 🔷 Azure Resource Graph
  • 🔷 Windows and Web Experiences Platform

In short: this isn’t a toy project. It’s production-ready—because it’s already powering some of Microsoft’s most demanding services.

FeatureWhat It Means
✅ Redis Protocol SupportDrop-in replacement for many Redis workloads
📦 Cluster ShardingDistributes cache across nodes for scale
🔁 Replication & RecoveryEnsures resilience and data safety
⚡ Native C# Implementation.NET-optimized and developer-friendly
📋 CheckpointingBuilt-in persistence for restarts and crashes

You can be up and running locally in just a few steps:

bash

git clone https://github.com/microsoft/garnet.git
cd garnet/src/GarnetServer
dotnet build -c Release
dotnet run

Want Docker?

bash

docker pull mcr.microsoft.com/garnet
docker run -p 3278:3278 mcr.microsoft.com/garnet

Garnet listens on port 3278 by default and supports many standard Redis commands like SET, GET, INCR, DEL, and more.

🧪 IS garnet Production-Ready?

Garnet is now in production inside Microsoft and is being actively maintained. If you’re building systems that demand ultra-low latency with .NET-friendly tooling—or you’re tired of paying for cloud Redis instances—Garnet might just be your hero.

Just keep in mind:

  • It’s ideal for read-heavy, ephemeral caching scenarios
  • It’s still rapidly evolving—watch the GitHub repo for updates
  • 🧠 Official Garnet Docs
  • 🔬 Microsoft Research: Garnet
  • 💻 GitHub Repository


Garnet isn’t trying to be Redis. It’s trying to be something leaner, faster, and .NET-native—with the kind of performance that’ll give your data layer superpowers. Don’t just follow the trend—start caching like it’s 2025.

Resolving Asynchronous Webhook Issues in Jira Data Center 10.3.3

Introduction

Jira Data Center is a powerful tool for managing enterprise-scale workflows, but even the best platforms encounter bugs. If you’re running Jira Data Center 10.3.3, you may have noticed inconsistent behavior with asynchronous webhooks, leading to incorrect payloads, delivery delays, and increased database strain. Atlassian has documented this issue, with fixes available in later versions. In this blog, we’ll explore the details of the problem and how to resolve it.

Understanding the Webhook Issue

Webhooks are crucial for real-time data synchronization between Jira and external applications. However, in Jira 10.3.3, asynchronous webhooks suffer from a request cache mismanagement issue, leading to:

  • Inconsistent payload data – Webhooks may send outdated or incorrect information.
  • Delayed webhook triggers – Poor queue management results in lagging event dispatch.
  • Excessive database queries – Some webhook executions generate unnecessary database load.
  • Webhook failures – If queue limits are exceeded, webhooks may be dropped entirely.

Users may observe errors similar to this in their logs:

Invalid use of RequestCache by thread: webhook-dispatcher

This issue arises because asynchronous webhooks fail to properly retain the correct request cache instance, causing a disconnect between webhook events and actual data retrieval.

If upgrading is not immediately possible, consider these interim solutions:

  1. Use Synchronous Webhooks
    • Synchronous webhooks do not rely on the flawed caching mechanism.
    • If your integration allows, temporarily switch critical webhooks to synchronous execution.
  2. Reduce Webhook Frequency
    • Limit unnecessary webhook triggers to reduce queue congestion.
    • Adjust webhook filters to only trigger on essential events.
  3. Monitor and Retry Failed Webhooks
    • Implement manual webhook retries by tracking failed webhook logs.
    • Use automation tools like scripts or API calls to resend failed events.
  4. Optimize Queue Limits
    • Modify atlassian-jira.properties to adjust webhook dispatch settings.
    • Increasing queue size slightly may help mitigate dropouts.

These workarounds can help stabilize webhook behavior while waiting for a long-term fix.

Atlassian has resolved this issue in Jira Data Center 10.3.6, 10.6.1, and 10.7.0. If possible, upgrading to one of these versions is the recommended solution.

  1. Backup Your Data – Always take a full database backup before upgrading.
  2. Review Plugin Compatibility – Some third-party plugins may require updates.
  3. Test in a Staging Environment – Run the upgrade in a test instance before deploying in production.
  4. Monitor Post-Upgrade Webhook Performance – Verify that webhooks behave correctly after the update.

Upgrading to a fixed version not only resolves the webhook problem but can also improve Jira’s overall performance and stability.

Webhooks are essential for integrating Jira with external tools, automating workflows, and maintaining data consistency. If you’re facing issues with asynchronous webhooks in Jira Data Center 10.3.3, upgrading to a patched version is the best approach. If immediate upgrading isn’t feasible, the temporary workarounds discussed above can help mitigate disruptions.

Have you encountered this issue? Share your experiences and solutions in the comments!

Test

  • AI-Powered Enhancements:
    • Predictive analysis to prevent build failures.
    • Anomaly detection for proactive issue resolution.
    • Automated decision-making for resource optimization.
    • Self-healing pipelines to fix errors autonomously.
  • Key Use Cases in Jenkins Pipelines:
    • Smart test selection for efficient execution.
    • Build optimization based on AI insights.
    • Failure prediction and prevention mechanisms.
    • Intelligent deployment strategies for seamless rollouts.
  • Integration Steps:
    • Leverage Jenkins plugins and log analysis tools.
    • Connect with AI platforms like AWS SageMaker.
    • Train custom AI models for pipeline automation.
  • Challenges and Best Practices: Data privacy, complexity, and cost considerations.

Would you like me to generate the PowerPoint (.pptx) file for you? Let me know how I can refine it further! 🚀

Mastering Slack Workspaces

Mastering Slack Workspaces: Building Collaborative Excellence

Slack isn’t just another tool in the digital workspace arsenal. It’s a meticulously designed ecosystem where teams come together to create, collaborate, and innovate. Let’s dive into the fundamentals of setting up workspaces, uncovering the blueprint for Enterprise Grid, and understanding the art of managing workspace visibility and access.

What Is a Slack Workspace?

In Slack’s world, a workspace is the central hub of your team’s activities. It’s not just a collection of conversations—it’s a dynamic environment tailored for collaboration. While a workspace is your command center, channels within it act as specialized neighborhoods for focused discussions.

Setting Up Your Workspace: A Step-by-Step Guide

Creating your workspace is straightforward yet impactful:

  1. Start with the Basics Visit slack.com/create and follow the prompts to set up your space. Select a name reflecting your company’s identity and ensure the workspace URL aligns with your brand.
  2. Onboard Your Team Send email invitations or share invite links to make onboarding seamless.
  3. Design Channels Intentionally Create topic-specific channels, such as #marketing or #help-desk, to streamline discussions.
  4. Enhance Productivity with Apps Add tools and integrations that complement your workflows.

Designing the Ultimate Workspace

A well-designed workspace isn’t just functional—it fosters engagement:

  • Map Operations Reflect your organization’s structure by creating channels corresponding to departments or projects.
  • Define Roles and Permissions Clearly set who can create channels or invite members through settings.
  • Name Channels Strategically Use naming conventions to maintain clarity and relevance.
  • Conduct Regular Reviews Periodically assess your workspace to keep it aligned with evolving needs.
  • Embrace Feedback Adapt your design based on team input to ensure optimal functionality.

Enterprise Grid: The Blueprint for Large Organizations

For sprawling organizations, Slack’s Enterprise Grid acts as the motherboard, seamlessly connecting multiple workspaces. Imagine your company as a bustling city. Each department or project is a neighborhood, while the Enterprise Grid is the city plan that ties everything together.

  1. Start with a Blueprint Sketch out your workspace plan using tools like Lucidchart and gather input from department heads to ensure alignment with team needs.
  2. Plan for Growth Create fewer workspaces initially and expand as needed. Design templates with standardized settings, naming conventions, and permissions.
  3. Balance Structure and Flexibility Clearly outline workspace purposes, and assign admins to oversee day-to-day operations.
  4. Best Practices for Enterprise Grid
    • Avoid workspace sprawl; aim for the Goldilocks zone of just the right number of workspaces.
    • Use multi-workspace channels for broad collaborations.
    • Ensure every member has a “home” workspace and intuitive navigation.

Managing Visibility and Access: Be the Gatekeeper

Slack offers four visibility settings tailored to varying collaboration needs:

  1. Open: Accessible to all in the organization.
  2. By Request: Members apply for access, ensuring a moderated environment.
  3. Invite-Only: Exclusive for invited members—ideal for confidential projects.
  4. Hidden: Completely private and by invitation only.

Use tools like Slack Connect for secure external collaborations and manage permissions to maintain confidentiality where necessary.

The Power of Multi-Workspace Channels

Think of multi-workspace channels as the hallways connecting the various rooms in your city. They enable cross-department collaboration, such as creating a #product-launch channel for marketing and product teams to unite.

Set permissions thoughtfully to balance collaboration with confidentiality. Restrict posting rights for announcement-focused channels to maintain clarity and focus.

The Intersection of Culture and Technology

Great workspaces are a reflection of the team culture they foster. While technology facilitates collaboration, it’s the people and their needs that drive its success. Design your workspace to serve both.

overview of amazon DMS, sct and additional database services

In today’s dynamic digital landscape, businesses are continually seeking ways to optimize operations, reduce costs, and enhance agility. One of the most effective strategies to achieve these goals is by migrating data to the cloud. Amazon Database Migration Service (DMS) is an invaluable tool that simplifies the process of migrating databases to Amazon Web Services (AWS).
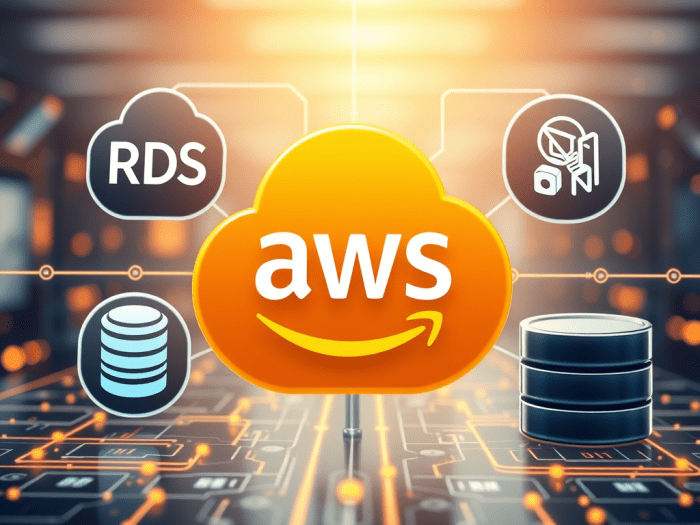
Amazon DMS is a managed service that facilitates the migration of databases to AWS quickly and securely. It supports various database engines, including:

  • Amazon Aurora
  • PostgreSQL
  • MySQL
  • MariaDB
  • Oracle
  • SQL Server
  • SAP ASE
  • and more!

With Amazon DMS, businesses can migrate data while minimizing downtime, making it ideal for operations that require continuous availability.

  1. Ease of Use: Amazon DMS is designed to be user-friendly, allowing you to start a new migration with just a few clicks in the AWS Management Console.
  2. Minimal Downtime: A key feature of Amazon DMS is its ability to keep the source database operational during the migration, ensuring minimal disruption to business activities.
  3. Support for Heterogeneous Migrations: Amazon DMS supports both homogeneous (same database engine) and heterogeneous (different database engines) migrations, providing flexibility to switch to the most suitable database engine.
  4. Continuous Data Replication: Amazon DMS enables continuous data replication from your source database to your target database, keeping them synchronized throughout the migration.
  5. Reliability and Scalability: Leveraging AWS’s robust infrastructure, Amazon DMS provides high availability and scalability to handle your data workload demands.
  6. Cost-Effective: With a pay-as-you-go pricing model, Amazon DMS offers a cost-effective solution, meaning you only pay for the resources used during the migration.

Step 1: Setup the Source and Target Endpoints

The initial step in using Amazon DMS is to configure your source and target database endpoints. The source endpoint is the database you are migrating from, and the target endpoint is the database you are migrating to.

Next, create a replication instance responsible for executing migration tasks and running the replication software.

Once the replication instance is set up, configure migration tasks that define the specific data to be migrated and the type of migration (full load, change data capture, or both).

With everything configured, start the migration process. Amazon DMS will migrate the data as specified in your migration tasks, ensuring minimal downtime and continuous data replication.

Monitor the progress and performance of your tasks using the AWS Management Console. Amazon DMS provides detailed metrics and logs to help optimize the migration process.

Amazon DMS is perfect for database consolidation, simplifying the management and reducing costs by consolidating multiple databases into a single database engine. This process improves performance and optimizes resource utilization.

  • Simplified Management: Managing a single database engine is easier than handling multiple disparate systems.
  • Cost Reduction: Consolidating databases can lead to significant cost savings by reducing licensing and maintenance expenses.
  • Improved Performance: A consolidated database environment can optimize resource utilization and enhance overall performance.

The Schema Conversion Tool (SCT) complements Amazon DMS by simplifying the migration of database schemas. SCT automatically converts source database schemas to formats compatible with target database engines, including database objects like tables, indexes, and views, as well as application code like stored procedures and functions.

  • Automatic Conversion: SCT automates schema conversion, reducing the manual effort required.
  • Assessment Reports: Detailed assessment reports highlight incompatibilities or conversion issues, enabling proactive resolution.
  • Data Warehouse Support: SCT supports data warehouse conversions, allowing businesses to migrate large-scale analytical workloads to AWS.

AWS offers a variety of managed database services that complement Amazon DMS, providing a comprehensive suite of tools to meet diverse data needs.

Amazon DocumentDB is a fully managed document database service designed for JSON-based workloads, compatible with MongoDB. It offers high availability, scalability, and security, making it ideal for modern applications.

Amazon Neptune is a fully managed graph database service optimized for storing and querying highly connected data. It supports Property Graph and RDF models, making it suitable for social networking, recommendation engines, and fraud detection.

Amazon QLDB is a fully managed ledger database providing a transparent, immutable, and cryptographically verifiable transaction log. It is perfect for applications requiring an authoritative transaction record, such as financial systems, supply chain management, and identity verification.

AWS Managed Blockchain enables the creation and management of scalable blockchain networks, supporting frameworks like Hyperledger Fabric and Ethereum. It is ideal for building decentralized applications.

Amazon ElastiCache

Amazon ElastiCache is a fully managed in-memory data store and cache service supporting Redis and Memcached. It accelerates web application performance by reducing latency and increasing throughput, suitable for caching, session management, and real-time analytics.

Amazon DynamoDB Accelerator (DAX) is a fully managed, in-memory cache for DynamoDB, providing fast read performance and reducing response times from milliseconds to microseconds. It is perfect for high read throughput and low-latency access use cases like gaming, media, and mobile applications.

Conclusion

Amazon Database Migration Service (DMS) is a versatile tool that simplifies database migration to the AWS cloud. Whether you’re consolidating databases, using the Schema Conversion Tool, or leveraging additional AWS database services like Amazon DocumentDB, Amazon Neptune, Amazon QLDB, Managed Blockchain, Amazon ElastiCache, or Amazon DAX, AWS offers a comprehensive suite of solutions to meet data needs.

brief overview of ddos threat

Understanding DDoS Attacks and AWS Protection

A Library Analogy for DDoS Attacks

Imagine a library where visitors can check out books at the front desk. After checking out their books, they enjoy reading them. However, suppose that a prankster checks out multiple books and never returns them. This causes the front desk to be unavailable to serve other visitors who genuinely want to check out books. The library can attempt to stop the false requests by identifying and blocking the prankster.

In this scenario, the prankster’s actions are similar to a denial-of-service (DoS) attack.

Denial-of-Service (DoS) Attacks

A denial-of-service (DoS) attack is a deliberate attempt to make a website or application unavailable to users. In a DoS attack, a single threat actor targets a website or application, flooding it with excessive network traffic until it becomes overloaded and unable to respond. This denies service to users who are trying to make legitimate requests.

Distributed Denial-of-Service (DDoS) Attacks

Now, suppose the prankster enlists the help of friends. Together, they check out multiple books and never return them, making it increasingly difficult for genuine visitors to check out books. These requests come from different sources, making it impossible for the library to block them all. This is similar to a distributed denial-of-service (DDoS) attack.

In a DDoS attack, multiple sources are used to start an attack that aims to make a website or application unavailable. This can come from a group of attackers or even a single attacker using multiple infected computers (bots) to send excessive traffic to a website or application.

Types of DDoS Attacks

DDoS attacks can be categorized based on the layer of the Open Systems Interconnection (OSI) model they target. The most common attacks occur at the Network (Layer 3), Transport (Layer 4), Presentation (Layer 6), and Application (Layer 7) layers. For example, SYN floods target Layer 4, while HTTP floods target Layer 7.

Slowloris Attack

One specific type of DDoS attack is the Slowloris attack. In a Slowloris attack, the attacker tries to keep many connections to the target web server open and hold them open as long as possible. It does this by sending partial requests, none of which are completed, thus tying up the server’s resources. This can eventually overwhelm the server, making it unable to respond to legitimate requests.

UDP Flood Attack

Another type of DDoS attack is the UDP flood attack. In a UDP flood attack, the attacker sends a large number of User Datagram Protocol (UDP) packets to random ports on a target server. The server, unable to find applications at those ports, responds with ICMP “Destination Unreachable” packets. This process consumes the server’s resources, eventually making it unable to handle legitimate requests.

AWS Shield: Your DDoS Protection Solution

To help minimize the effect of DoS and DDoS attacks on your applications, you can use AWS Shield. AWS Shield is a service that protects applications against DDoS attacks, offering two levels of protection: Standard and Advanced.

  • AWS Shield Standard: Automatically protects all AWS customers at no cost. It defends your AWS resources from the most common, frequently occurring types of DDoS attacks. As network traffic comes into your applications, AWS Shield Standard uses various analysis techniques to detect malicious traffic in real-time and automatically mitigates it.
  • AWS Shield Advanced: A paid service that provides detailed attack diagnostics and the ability to detect and mitigate sophisticated DDoS attacks. It also integrates with other services such as Amazon CloudFront, Amazon Route 53, and Elastic Load Balancing. Additionally, you can integrate AWS Shield with AWS WAF by writing custom rules to mitigate complex DDoS attacks.

Additional AWS Protection Services

  • AWS Web Application Firewall (WAF): Protects your applications from web-based attacks, such as SQL injection and cross-site scripting (XSS).
  • Amazon CloudFront and Amazon Route 53: These services offer built-in DDoS protection and can be used to distribute traffic across multiple locations, reducing the impact of an attack.

Best Practices for DDoS Protection

To enhance your DDoS protection, consider the following best practices:

  • Use AWS Shield: Enable AWS Shield Standard for basic protection and consider upgrading to AWS Shield Advanced for more comprehensive coverage.
  • Deploy AWS WAF: Use AWS WAF to protect your web applications from common web-based attacks.
  • Leverage CloudFront and Route 53: Use these services to distribute traffic and mitigate the impact of DDoS attacks.
  • Monitor and Respond: Regularly monitor your applications and network traffic for signs of DDoS attacks and respond quickly to mitigate any potential impact.

Conclusion

DDoS attacks are a serious threat to the availability and performance of your applications. By leveraging AWS Shield and other AWS services, you can protect your applications from these attacks and ensure they remain available and responsive to your users.